
-
Solar technology
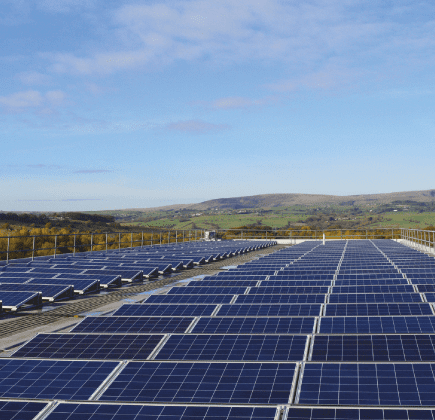
Commercial solar technology
Solar solutions built to boost energy efficiency, reduce costs and support a cleaner, more resilient future for your business.
View all- Solar Panels

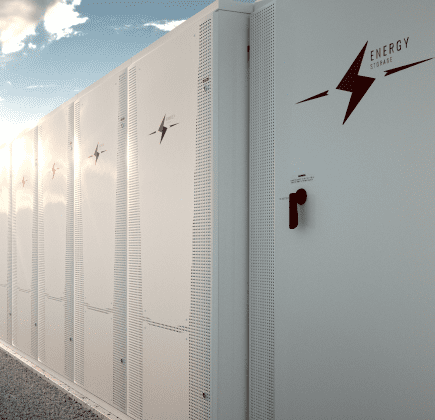
- Battery Storage
- Maintenance & Asset Management
- Solar Panels
- Case studies
- Contact

A guide to solar panel installation
For many UK businesses, investing in commercial solar panels has become one of the most effective ways to reduce energy costs, improve sustainability credentials, and protect against rising grid prices. However, understanding how a solar installation project unfolds — from the first feasibility check through to ongoing operation and maintenance — is key to maximising long-term value.
This guide walks you through the end-to-end solar journey, helping business owners, energy managers, and facility teams understand what to expect at each stage.
How are solar panels installed?
1. Feasibility & Initial Assessment
Every successful solar project starts with a detailed feasibility study. This phase establishes whether solar is technically and financially viable for your site.
Key steps include:
- Energy data review: Analysing your half-hourly electricity consumption to size the system appropriately.
- Roof or land assessment: Checking structural capacity, shading, and available area for solar arrays.
- Grid connection check: Ensuring there’s capacity on the local network to export or import electricity safely.
- Financial modelling: Estimating energy savings, payback period, and ROI — including options such as CapEx, asset finance, or Power Purchase Agreements (PPA).
At this stage, your installer will provide an outline design and commercial proposal showing the best system size and configuration for your business objectives.
2. Detailed Site Survey & Design
Once feasibility is confirmed, the next step is a detailed engineering survey. This involves site visits by structural engineers, electrical designers, and health & safety specialists to capture precise details of the roof, cable routes, and switchgear locations.
From here, the final system design is produced — including layout drawings, string configuration, inverter placement, and cable sizing. The design ensures compliance with all relevant standards (BS 7671, G99, and DNO requirements) and that your system performs safely and efficiently.
3. Planning & Grid Application
Depending on your project type and location, planning permission may be required. Most roof-mounted systems fall under Permitted Development Rights, but ground-mounted systems or carports often need full planning consent.
Simultaneously, your installer will apply for grid connection approval under the G99 process to ensure the local Distribution Network Operator (DNO) allows your system to connect.
These applications can take several weeks to process, so it’s essential that they are submitted early to avoid delays.
4. Procurement & Mobilisation
Once approvals are in place, your installer will finalise procurement — securing panels, inverters, mounting systems, transformers, and other balance-of-plant components.
For business clients, choosing Tier-1 equipment suppliers ensures long-term reliability and warranty protection (typically 25+ years for solar modules).
A construction programme is then developed, outlining milestones from delivery to commissioning. This stage may also include coordination with your facilities team to manage shutdowns or access restrictions.
5. Construction & Installation
This is the most visible phase — when your solar system is actually built.
Installation typically involves:
- Mounting panels to the roof or ground framework.
- Installing inverters, cabling, and monitoring equipment.
- Connecting to your LV or HV electrical infrastructure.
- Commissioning and safety testing.
For a typical 1–5 MW commercial solar system, installation is approximately 150kW per week, depending on weather, site complexity, and access.
A reputable EPC contractor will manage Health, Safety & CDM compliance, coordinate with your internal teams, and provide regular progress updates.
6. Commissioning & Handover
Once installed, the system undergoes a series of commissioning tests to confirm it’s performing to design specifications.
You’ll receive a comprehensive handover pack, including:
- As-built drawings and datasheets
- Test certificates and commissioning reports
- O&M manual and warranty documents
- Export MPAN registration (if exporting to the grid)
Your solar array is then switched on and begins generating clean, renewable power — immediately reducing your grid import costs.
7. Operation & Maintenance (O&M)
Solar systems are low-maintenance, but regular inspection and servicing are vital for optimal performance and long-term yield.
A professional O&M package will typically include:
- Remote monitoring via web portal for live performance tracking
- Annual preventative maintenance visits and electrical inspections
- Panel cleaning where required
- Fault response and warranty management
For commercial systems, this ensures consistent generation performance and protects your warranties and investment returns.
8. Long-Term Performance & Reporting
Post-installation, your solar partner should provide performance ratio (PR) reporting, yield analysis, and financial tracking against your original model.
Many businesses choose to integrate solar data into their ESG or CSR reporting, demonstrating measurable CO₂ savings and sustainability impact to customers and stakeholders.
Funding options and energy savings
You don’t need to fund a system outright to benefit – there are several funding options available to minimise the initial financial outlay:
- Outright purchase gives the highest lifetime return and fastest net savings once payback is reached.
- Asset finance/leasing spreads cost over time and can be structured to be cash-flow positive from day one.
- Power Purchase Agreement (PPA) lets you access discounted renewable electricity from a system on your roof or land with zero capital outlay – you simply buy the solar energy generated on site at an agreed rate.
Find out more about our routes to finance and ownership:
You can also read more about our solar panel systems and the kinds of energy savings businesses typically achieve.
Why choose an experienced commercial solar partner?
A well-executed solar project requires expertise across design, electrical engineering, grid compliance, health & safety, and ongoing maintenance. Choosing a specialist EPC partner like Low Carbon Energy (part of Activ8 Energies and SSE Group) ensures every phase — from feasibility to O&M — is managed seamlessly under one roof.
If you’re considering installing solar panels and want a practical, low-disruption service, we can help. Speak to our team, book a survey or request a detailed proposal today by calling 01282 421 489 or filling out a contact form.
FAQs
How are solar panels connected?
PV modules connect in series as ‘strings’ to reach the target DC voltage, then into inverters which convert DC to AC for your building. Any surplus solar energy can then be exported back to the grid via your meter, in agreement with your energy supplier.
How are solar batteries installed?
Battery systems are installed indoors or in external enclosures, connected on the AC side (most commonly for commercial) or DC-coupled, depending on the design. We specify batteries to smooth peaks and increase self-consumption.
What is the best way to install solar?
While there isn’t a single ‘best’ method, the right approach matches your site. For example, in residential properties, the priorities differ from commercial/industrial sites. For the latter, we optimise for safety, yield, grid compliance and lifecycle cost. A professional survey ensures the installation process and electrical work meet current UK standards.
What’s the typical timeline?
Every project is different – larger systems (or weather-sensitive works) may take longer, but small rooftop systems can be faster once the necessary approvals are made. See a more detailed overview at the ‘What’s a typical timeline for solar panel installation?’ section above.
Can anyone install solar panels?
We strongly advise using experienced, accredited commercial installers for PV panel installation to safeguard quality, warranty and performance of your system.
Where’s the best place to install solar panels?
Usually, rooftops are the best place to install a solar panel system, however you can also consider ground-mounted or carports if you need more capacity.
Energy Technology

Powering your present. Preserving your future.
Call us on 01282 421 489
Accreditations


strategy be a priority?